FRAMING JOHN DELOREAN - ON VOD www.framingjohndeloreanfilm.com
Results 1 to 5 of 5

Thread: Repainting the fuel distributor

  1. #1
    Member
    Join Date:  May 2014

    Location:  Redondo Beach

    Posts:    58

    My VIN:    1325

    Repainting the fuel distributor

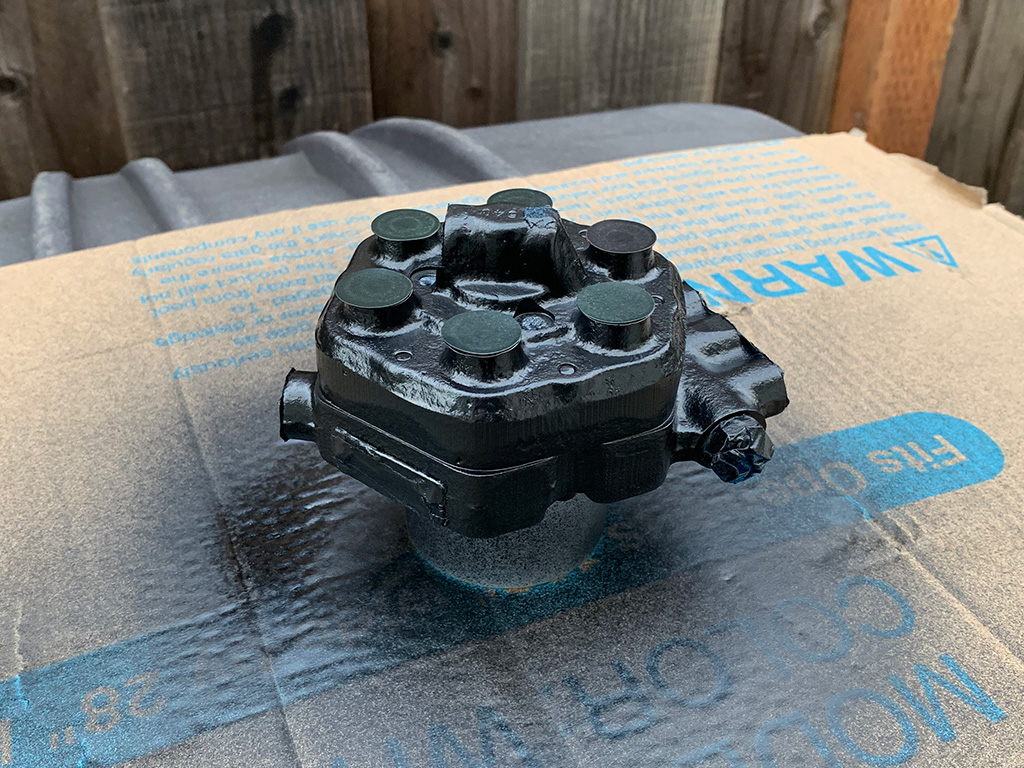
    I'd like to clean up my fuel distributor with an application of POR15. I've used a wire brush with some marginal results, but it really needs a repaint for a long term solution.

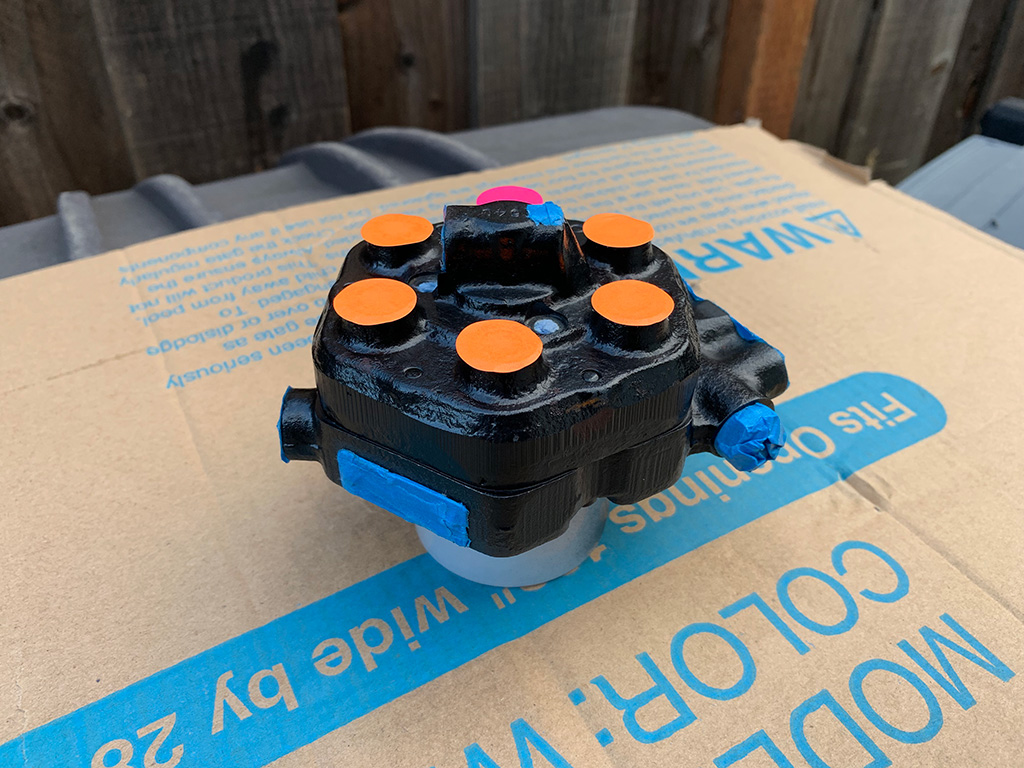
    I was considering using a spray can with high temp POR15 with the distributor separated from the mixture control unit.

    Would silicone plugs & masking tap be enough to prevent fuel system contamination?

    Is it safe to separate it from the mixture control unit or better to paint it while still attached?

    Is hand-painting going to be safer or give better results than a spray?


    Thanks in advance.

  2. #2
    Motors about after dark Michael's Avatar
    Join Date:  May 2011

    Posts:    4,764

    My VIN:    Banged your VIN'S mom

    If you haven't already removed the distributer, I see no reason to do so to paint. It's a fairly rough cast part so a soft brush should priduce a nice finish. Unless it's just knackered, with a steady hand you could probably leave the lines in place as well. No sense in risking getting paint anywhere it shouldn't be by spraying.

    The distributer is never really hot and very well protected. I used some automotive base with a little hardener mixed in and touched it up with a 1/4" flat brush. Even left the lines in place when I did it, albeit mine just had a few bare spots on the top and sides.

    20200309_144715.jpg

  3. #3
    Senior Member DMC-81's Avatar
    Join Date:  Apr 2014

    Location:  Florida

    Posts:    2,371

    My VIN:    <2000

    Club(s):   (DCF)

    Quote Originally Posted by Michael View Post
    If you haven't already removed the distributer, I see no reason to do so to paint. It's a fairly rough cast part so a soft brush should priduce a nice finish. Unless it's just knackered, with a steady hand you could probably leave the lines in place as well. No sense in risking getting paint anywhere it shouldn't be by spraying.

    The distributer is never really hot and very well protected. I used some automotive base with a little hardener mixed in and touched it up with a 1/4" flat brush. Even left the lines in place when I did it, albeit mine just had a few bare spots on the top and sides.

    20200309_144715.jpg
    +1 I hand brushed mine in place with flat black paint.

    Also, if you remove the lines, I suggest to ensure you mask off the flat surfaces that the copper crush washers go, and afterward, very carefully remove any paint that gets on these with a cotton swab and brake cleaner. Anything but a bare smooth metal surface will cause fuel weeping and or leaks.

    Last edited by DMC-81; 03-09-2020 at 07:53 PM.
    Dana

    1981 DeLorean DMC-12 (5 Speed, Gas Flap, Black Interior, Windshield Antenna, Dark Gray)
    Restored as "mostly correct, but with flaws corrected". Pictures and comments of my restoration are in the albums section on my profile.
    1985 Chevrolet Corvette, Z51, 4+3 manual
    2006 Dodge Magnum R/T (D/D)
    2010 Camaro SS (Transformers Edition)

  4. #4
    October 1981 Col Bennett's Avatar
    Join Date:  Aug 2016

    Location:  Bay Area, CA

    Posts:    202

    Club(s):   (NCDMC) (DCUK)

    I gave mine a light refresh last year.

    Step 1
    Mask every hole and corresponding flat surface area with tape. I used circular colored sticky dots available from the likes of Target along with some blue 3M masking tape for the larger holes. Like Dana said, be sure to avoid getting paint on any of the flat surfaces where the copper washers meet the distributer. Super important!

    Step 2
    I then meticulously masked off the Bosch plate and blue paint smudge at the top to preserve the little details.

    Step 3
    You have to be careful to avoid getting paint in the underside opening too. I taped the base of the distributer to an upside-down spray can lid to cover the hole - which also helped raise the distributer to get perfect paint coverage.

    Step 4
    I spent ages on prep and then sat the whole prepped unit on top of a square piece of cardboard so I could easily rotate it at a good height while spraying. My compost bin turned out to be the perfect height.

    Step 5
    It's worth noting that I carefully cleaned the distributer in advance with SEM Soap (39362) and a toothbrush, being crazy careful to plug all holes and avoid any moisture ingress. I did not use water, just a damp cloth. I then prepped the distributer with SEM Plastic & Leather Prep (38353), and used the SEM XXX Adhesion Promoter (77724) before painting with SEM Trim Black (39143) - which is a near-perfect match to the original coating…

    Step 6
    I sprayed the whole distributer evenly with one hand, while rotating the cardboard with my other hand to get an even 360 degree paint coverage. I applied the adhesion promoter first according to the instructions and then applied three coats of SEM Trim Black with a short flash time between each coat as it was a warm day.


    That's it. Wait until the paint has fully cured for 24 hours and then remove the masking tape and stickers and you're done. Be sure to wipe off any sticky residue from the tape with something like rubbing alcohol. Don't use anything oily - like a glue remover. You want those flat surfaces to be totally clean and super smooth.

    TIP: The colored dots help you judge when the coverage is perfect. Once the colored dots are black, you're done.


    Before


    After

    Last edited by Col Bennett; 03-10-2020 at 01:51 AM.
    DeLorean DMC-12 (October 1981)
    Manual transmission. Grooved hood. Grey interior. Rear antenna.
    Obsessive perfectionist and 64th annual 2019 Hillsborough Concours D'Elegance class winner.

  5. #5
    Member
    Join Date:  May 2014

    Location:  Redondo Beach

    Posts:    58

    My VIN:    1325

    This project ended up significantly delayed but I finally finished! Thank you all for the guidance on this!

    I pulled the entire distributor off and resprayed, along with all new stainless bolts, brackets around the air metering unit. I went a little overboard.


    The respray job went well but I think I was too conservative on masking off the mating surfaces for the banjo bolts with a fear of creating leaks & contamination.

    I will need to go back in and touch that up.

    Attachment 64258Attachment 64257

Posting Permissions

  • You may not post new threads
  • You may not post replies
  • You may not post attachments
  • You may not edit your posts
  •