Jared L.
June '81, manual, black inter. VIN 2087
Other cars: 2012 Toyota Sienna, 2007 Mazda 6, 1999 Jeep Cherokee
DeLorean blog: http://deloreanblog.blogspot.com/

Location: sacramento
Posts: 1,415
My VIN: 1768
Club(s): (NCDMC) (DCUK)
More cosmetic repairs continue. Lots of epoxy repairs and sanding to the lower engine lid.
Also finished the mini louvers for the big louvers, I tried about 2 years ago to repaint them but they kept fisheyeing badly and no matter how many times I cleaned or sanded it would not accept paint smoothly, Today I Sandblasted them and actually got the old paint off nicely. While they look good in bare black plastic I decided to prime and SEM black paint them again to make sure they match the louvers. Success!
Finally after a few weeks, the cover looks good again.
I also need to replace some more rubber Coolant hoses under the car, while waiting for new silicon tube to come Im cleaning up the fuel closing plate, Ive scrapped a few things it seems.
After cleaning:
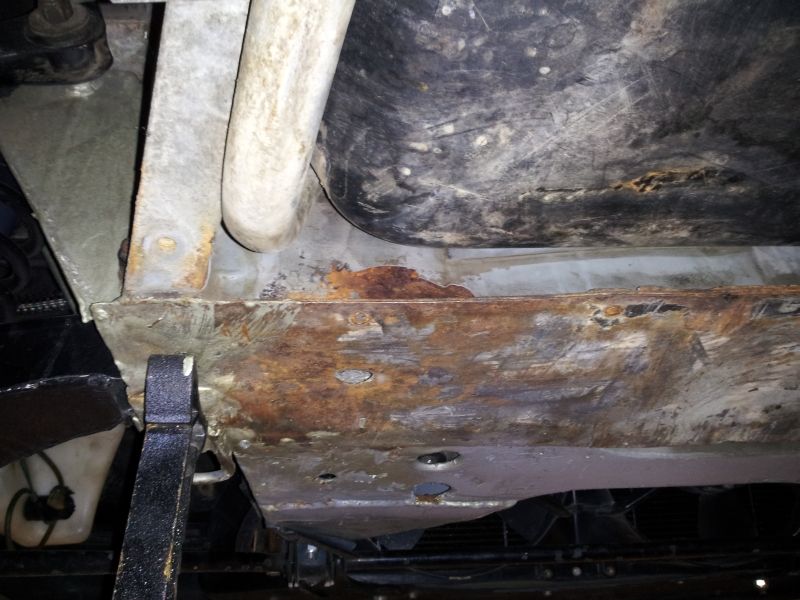
The back side has a few spots where the epoxy is damaged from brake fluid. There is a pretty large dent too ill need to repair too.
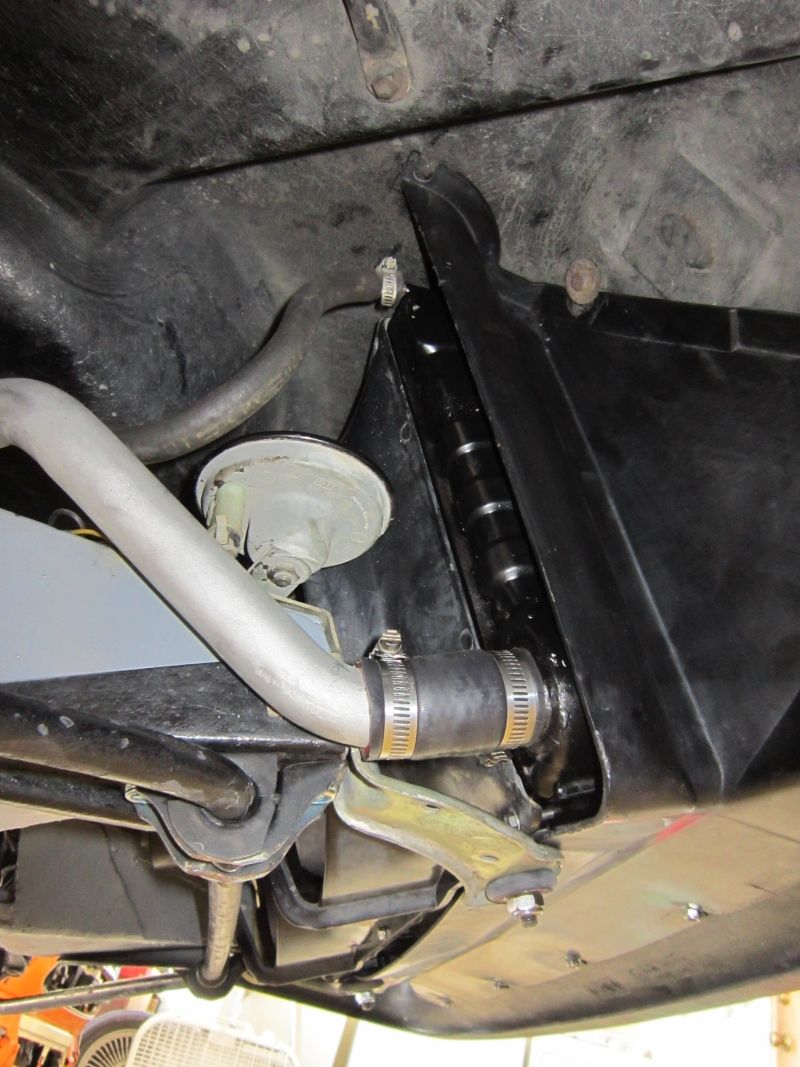
Now I have easy access to the hoses.
More epoxy damage, Im thinking i should remove the fuel tank again to clean this up. it still may be years before I have the opportunity to remove the frame for a proper full restoration.


Location: Illinois
Posts: 2,440
My VIN: 11408
Club(s): (DMWC) (TXDMC) (DCUK) (DOI)
I noticed your bit about the frame, that is interesting that you want to do a frame off after all the work you have done! I guess one of the disadvantages of a rolling restoration. I ripped all my suspension off and figured i might as well pull the frame and be done with it. However the major advantage: You get to drive your car!
This is a great thread by the way, if I hadn't already mentioned it!
Supercharged 5.3L LS4 + Porsche 6spd
[email protected]
lsdelorean.com
I am not affiliated with Delorean Midwest in anyway.

Location: Sacramento-ish
Posts: 4,408
My VIN: 02100
Club(s): (NCDMC) (DCUK)
That closing plate and engine covers look great man. Happy for you to have those louvers looking so good after so long!
One of these days I need to drop my closing plate and learn to paint. The only rust on my whole frame is where the brake master leaked many years ago and ate the epoxy right under it. And one day I'll also need to fiberglass that crack in my louver, which means painting it too... Sigh
Got any photos of the completed louvers? I haven't seen your car with them in one piece in... Months? Years? Exciting!
Jon
1981 DMC-12 #02100. July 1981. 5-speed, black, grooved w/flap.
restoration log, March 2011 to present
full and detailed photo restoration log

Location: sacramento
Posts: 1,415
My VIN: 1768
Club(s): (NCDMC) (DCUK)
Yeah the frame will never be as nice as I want it to be unless it is fully removed and stripped. As you will see below I still have problem spots.
Glad you like the thread!
I decided to remove the fuel tank fully and check on a few things as well as be able to remove the tubes in there for a proper cleaning.
Fuel tank itself is still in fine shape.
No more old rubber under the car now.
As you can see there is a small area that the M/C has leaked brake fluid on to and has eaten the epoxy. luckily its only surface rust and after a heavy wire wheeling and quick paint touch up, it shouldnt fester much until I the day comes for the frame renewal.
Used some small sections of tube to insulate and protect the tank from the hot tubes
Last weekend, fellow Dmc owner David came over and helped swapped my failed plastic capped radiator for a solid used brass unit I got from Jon in vacaville, After a quick sandblasting and painting of the tanks it looked good as new. Only wish I could have installed newer cooling fans at the same time, but that day will come.


Location: sacramento
Posts: 1,415
My VIN: 1768
Club(s): (NCDMC) (DCUK)
You mean the engine lid? The lovers still need work and another repaint before I can install the mini louvers. I just finished gluing the mesh back in to the lower engine lid with windshield adhesive even though I just bought the missing metal clips that I needed to hold the mesh to the lid. Gluing is so much cleaner and much lighter, No rattle either.
Sadly I need to do one more top coat as something got on the paint as I was gluing the mesh in, and it looks kind of streaky.
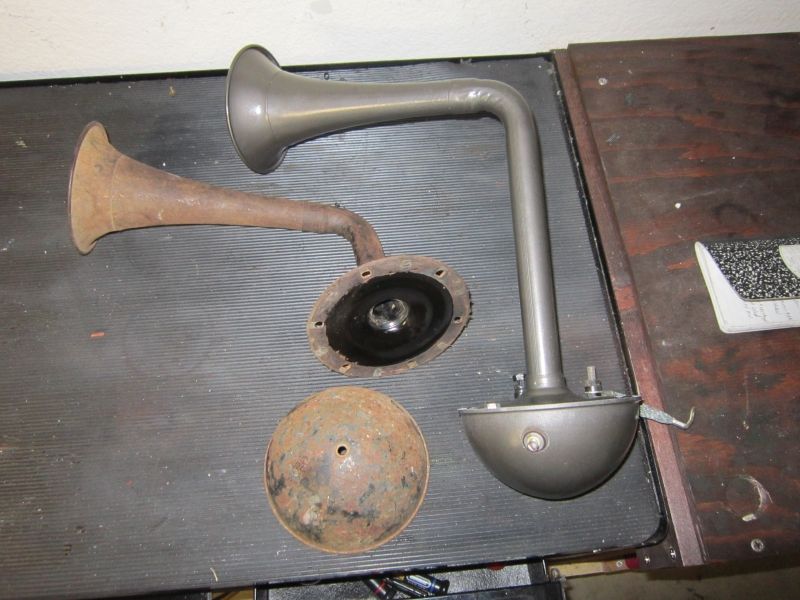
Also have another (unnecessary) project, installing these big ass 1940's ers AutoLite horns after I finish blasting, painting and rebuilding the second one. I will need a new power supply to these since they pull nearly 10 amp each when blowing.


Location: Illinois
Posts: 2,440
My VIN: 11408
Club(s): (DMWC) (TXDMC) (DCUK) (DOI)
Looks great Clint! That is a good idea around the gas tank, mine did not have that when I was taking apart my car. I will have to cut up some extra hose when I put my pipes back in.
Supercharged 5.3L LS4 + Porsche 6spd
[email protected]
lsdelorean.com
I am not affiliated with Delorean Midwest in anyway.

Location: sacramento
Posts: 1,415
My VIN: 1768
Club(s): (NCDMC) (DCUK)
Small update, Not been working in the garage as much these days, may continue slowly as winter approaches.
Created a silicone tube bleed valve set up for the radiator, sure makes it easy to get the air out.
Fiddled about with the EFI / Twin throttle project. Decided for sure to go with cables and spools over push rods and linkages to open the butterflies. It seems amazing how well random Bosch parts and similar era German/ Swedish parts are interchangeable and can work together in ways they were never intended to. The throttle spools from 70's volvo 240s fit perfectly and with a small set screw, attach well on to the throttle body of a '90 volvo 740 16v. even the half moon casting on the inside works as a throttle stop against the throttle body. It's weird.
Drilled and tapped for a 6-32 set screw to hold it on the flat section of the shaft, just need to install another in the right place so the idle stop screws can work.
Just some final trimming, fabricating a split cable set up and finishing one more adapter before I can try the twin throttles with K jet.

Location: 38.09080 N 23.8005 E
Posts: 2,038
My VIN: MMMMMCMXCII

Nice detailing!
Fear not of what you see outside....
But what is going on behind that!
VIN 5992/Body 5697/Frame 6000/Grey/Manual/ALL LED/Square HALOs/SPAX/DMOCO SS shifter/Genuine MOMO steering/iPhone base/Porsche turbo 997 exhaust/K&N/ SS: f.fascia mounts, brake lines, clutch line+fuel line+tank cover+heat shields/Posi-quiet brake pads/Poly: steering rack inserts+f.sway bar bushing+radius bushing/wings-a-loft/Radius enforced tabs n bolts/turbo fans... Oh! + a BTTF on/off replica set etc (still adding)

Location: sacramento
Posts: 1,415
My VIN: 1768
Club(s): (NCDMC) (DCUK)
Treated my self and the car to something nice
First time the car has had completely new front shocks in 32 years, Below are the shocks Ive run before. Right to left: Stock Girling (off a 18kmile car), DMCH Eibach (used with 30k miles and one ended up being blown so ive never actually used these more the a trip around the block so Still need to find a place to rebuild them), New Koni Adjustables, Mazda Miata rear Bilstein HDs with a few seasons of racing on them.
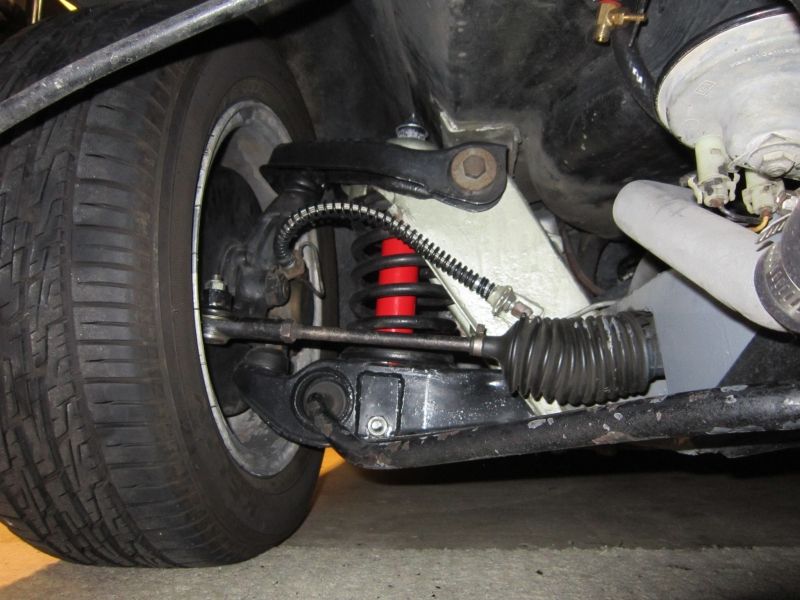
These Konis are modifed Pontiac Fiero front shocks (Koni #8040 1092). The lower bushing was pressed out and a urethane bushing with a 1/2" ID sleeve was installed, they are adjustable by compressing the shaft fully and rotating it within a 720' window, I started out in the middle adjustment and they are a noticeable improvement over the Girlings and the (worn) Billys. There is a slight amount of residual bouncing if you bounce the car up and down on one corner so Im going to set them a bit stiffer but while driving they feel devine
I would like to get another pair of new Bilsteins and do the same bushing treatment and compare them back to back with the konis since my experience with the Bills are not fair since they were used cast offs I got in a trade years back.
Installed easy just like a stock shocks ad you can see they are barely smaller.
