It does feel fast. Don't forget your elimination of the ballast resistor!


Location: Sacramento-ish
Posts: 4,408
My VIN: 02100
Club(s): (NCDMC) (DCUK)
It does feel fast. Don't forget your elimination of the ballast resistor!
Jon
1981 DMC-12 #02100. July 1981. 5-speed, black, grooved w/flap.
restoration log, March 2011 to present
full and detailed photo restoration log

Location: sacramento
Posts: 1,415
My VIN: 1768
Club(s): (NCDMC) (DCUK)
Hi everyone, its been about six months since I had a proper update. Ive been pretty busy, but not on the Delorean. I finally had the chance to finish building a car that I got about a year before the Delorean and it has been waiting patiently for six years. Well let me back up a bit and tell it's story.
This is a brief overview of the build of my 1975 Volvo 242 the "V8olvo". About 7 years ago I helped build a cheap race car for some customers, its was an 84' Volvo 244 with a 1985 Mustang drivetrain and was set up for road racing, I fell in love with the sound, the feel and uniqueness of the car but I wanted to be able to drive it on the street too. That same customer found me this car, a '75 (first year of the 200 series and smog exempt in Cali) that had been sitting in a forest since 1988! He pulled it to build a second car but ended up selling it to me for $200.
It was rough but back then I was ready to take on any project! I quickly began stripping the nasty rot that the forest had caused.
With a clean slate I could mock up the new power plant
There is plenty of room for a big v8, Made my own engine mounts and modified the trans mount to connect to the Ford T5, It fit amazingly well.
However I soon had to quit the job I had and didnt have the room and tools to continue the build so The car sat like this for 6 years in storage.
But Earlier this year I again had the time, space and tools at me disposal to finally build the beast. My new plan was to make the underhood very clean even if the exterior was faded and dented. I had to start with nothing in the engine bay, all the wiring was cut off at the firewall as mice had destroyed nearly every inch. I also filled and shaved any unneeded holes or brackets
I was able to modify mustang headers to fit but it was still very tight, This is a part I plan on redesigning soon. I also tweeked the engine and trans mounts to improve placement for balance and maintenance.
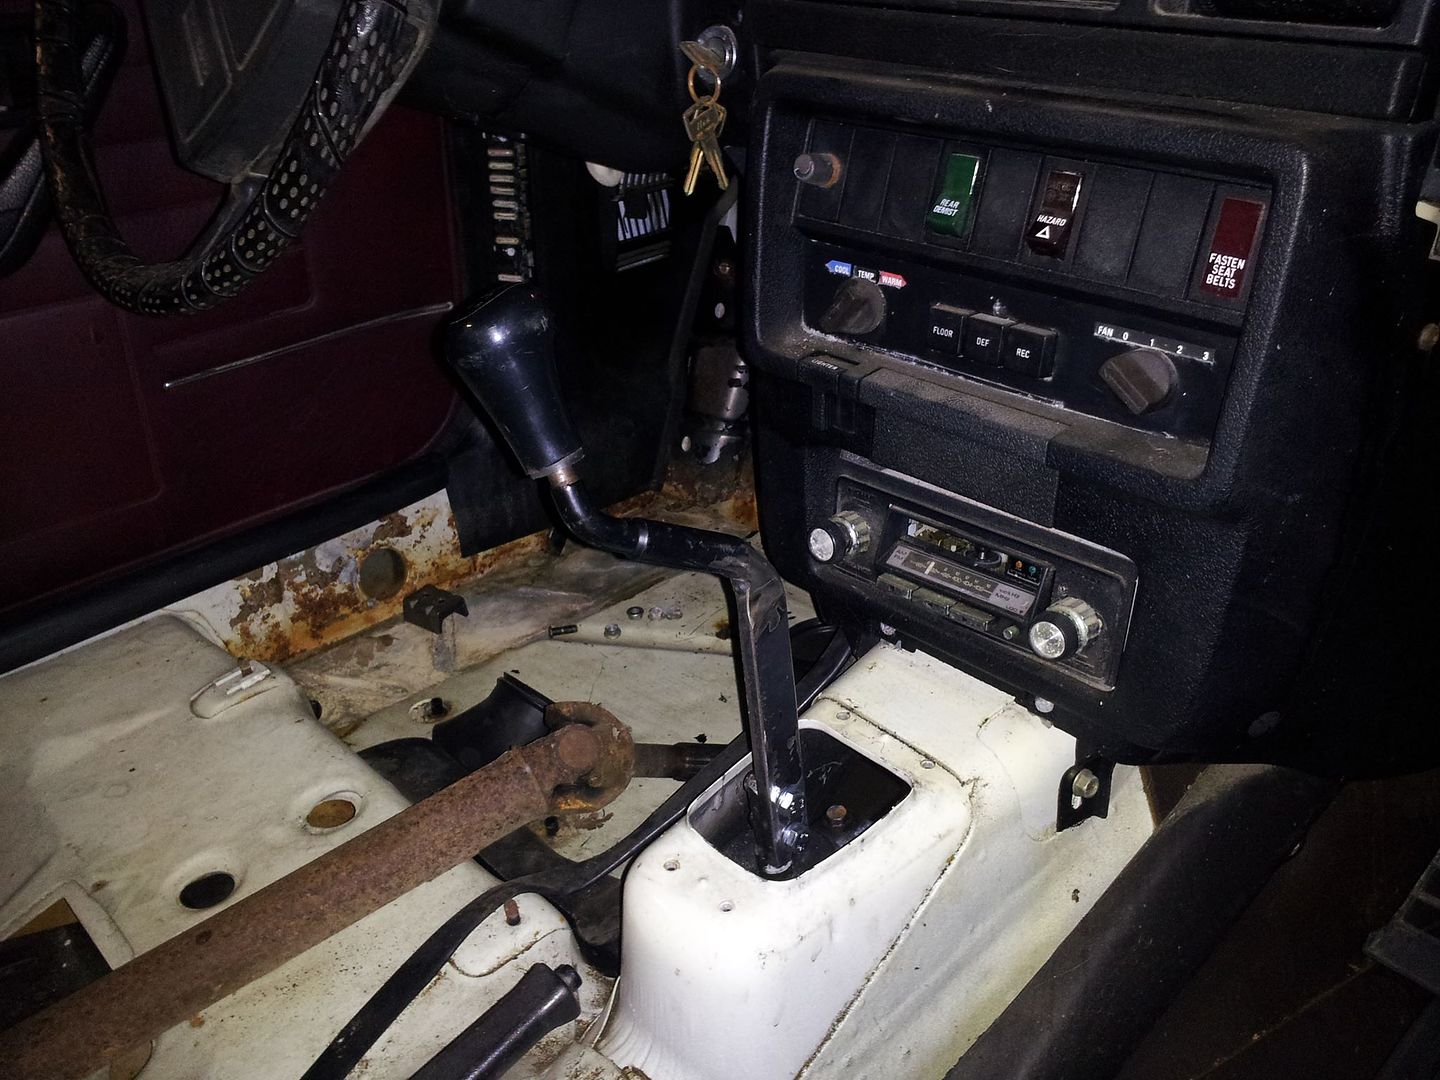
My old T5 transmission I used before was stolen so after I got another and better one I was able to make a new shifter handle.
Location: Sacramento-ish
Posts: 4,408
My VIN: 02100
Club(s): (NCDMC) (DCUK)
The most important question is - does it drive yet??
Jon
1981 DMC-12 #02100. July 1981. 5-speed, black, grooved w/flap.
restoration log, March 2011 to present
full and detailed photo restoration log
Location: sacramento
Posts: 1,415
My VIN: 1768
Club(s): (NCDMC) (DCUK)
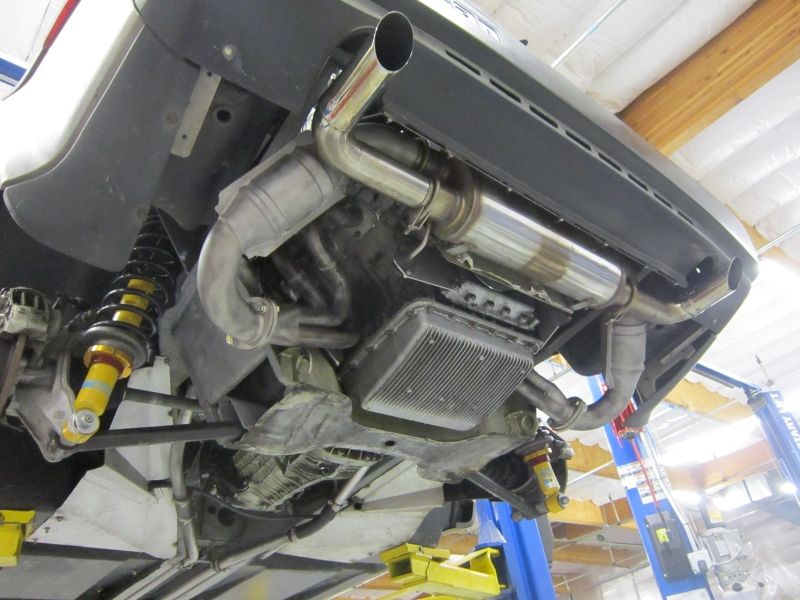
Full exhaust was built too, 2.25" from the headers with V band connectors, then merged to 3" back. very similar to the set up on that race car many years ago.
The brakes were shot, I couldnt even get them apart to rebuild so some reman calipers were installed, these are the larger brakes from the 80's Turbo models, All new rotors, lines, junctions, Master cylinder too
Many other little jobs ate up my evenings and weekends, restoring the fuel tank, new front suspension bushings, cleaning, painting. No dirty parts were put back on the car, That was my #1 rule. Finally the engine bay was ready for primer.
Then factory Cascade White paint, Not spray paint but proper automotive hardened urethane:
Now I needed a new engine, The old one I had planned to use had rusted out in the years sitting in the elements and it was a junk older block anyways,
I picked up this '87 long block which has the roller valve train and better internals. I stripped it, measured it out, Rebuilt it withe bearings rings, seals, better heads too.
Now final assembly could begin.
I also found a decent used interior, not as cool at the retro Red but it was a good deal and had like new seatbelts too.
Re wired the front end and tucked the harness inside the fender to hide it.
Rear mounted battery needed heavy cabling to transmit the power.
Then all the little details, throttle cable, heater hoses, starter power, alternator wiring,belt routing, custom drive shaft, clutch cable etc.
Last weekend I took her for her first test drive in 26 years! it was great, but the car still needs work so I can drive it everyday, Then stage 1 begins, shocks, springs, swaybars, camber plates, lumpy cams, EFI.......
Thanks for looking.
Location: Sacramento-ish
Posts: 4,408
My VIN: 02100
Club(s): (NCDMC) (DCUK)
Well that answers that!! Too freaking cool man. I can't wait to take a spin
Jon
1981 DMC-12 #02100. July 1981. 5-speed, black, grooved w/flap.
restoration log, March 2011 to present
full and detailed photo restoration log

Location: Reedsburg, WI
Posts: 4,026
My VIN: 5180
Club(s): (DMWC) (DCUK)
A sleeper! 😏
DENNIS
VIN 5180, Frame 3652, STAGE II, DM-eng Solid State Solutions (RPM Rly, Dm.Lt.Mod., Fan Fail Mod. , FAN Rly, HS.Rly) , HID headlights, SPAX user since 2009, Eibach springs, M Adj. Rear LCA's, DPNW poly-sway bar kit, DMCEU LCA Stabilizer link kit, DMCMW Illuminated door sills, Aussie Illuminated SS Shifter plate, REAL MOMO EVO Steering wheel, DELOREANA Extended View Side Mirrors w/ Heaters, DELOREANA LED Door Lights.

Location: Maple Grove, MN (Minneapolis)
Posts: 1,423
My VIN: 05457
Looks brand new! Can't wait to see it in action!
David Proehl
Location: sacramento
Posts: 1,415
My VIN: 1768
Club(s): (NCDMC) (DCUK)
2015 will be the year of the Delorean, or at least my Delorean. Here is a preview of some of the projects in play:
Location: sacramento
Posts: 1,415
My VIN: 1768
Club(s): (NCDMC) (DCUK)
Back again, nearly a year later. Man i have been really slacking, not a huge amount to report however but lets catch up. I have mostly been busy at work and constantly tinkering on the V8volvo project so the Delorean has had it's quietest year since ive owned it. Only put on about 3k miles too, the least ever and there has been a reason for that, 2015 didnt work out to be the Year of my Delorean like I hoped, Ive hit (literally) a few snags.
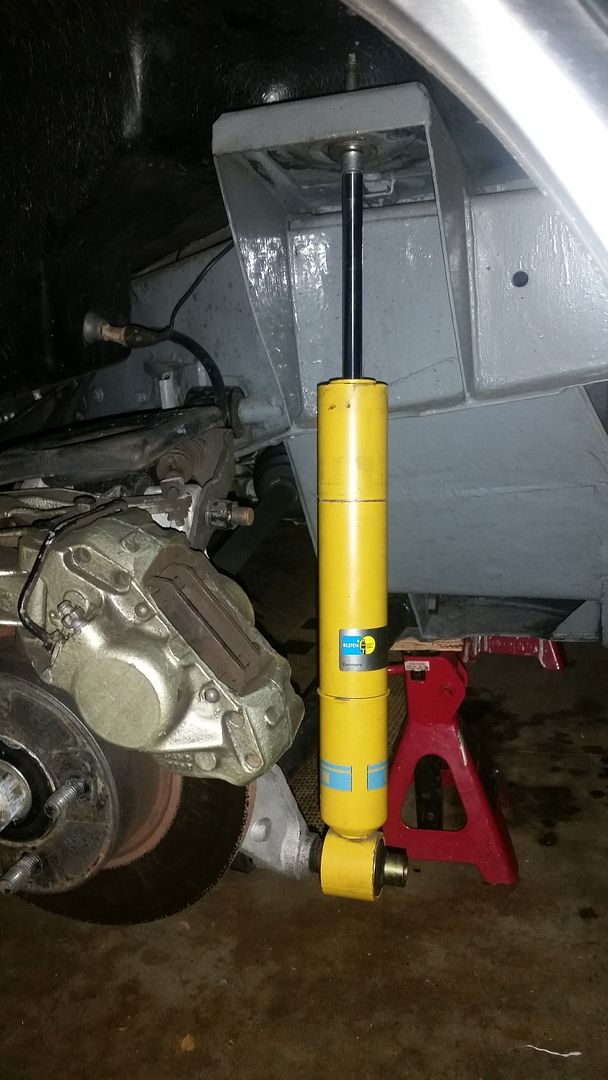
Back in February I finished up my Bilstein rear shock swap and have put about 2800miles on them since. They have been great, you can check out all the details on how they were made on this thread:
http://dmctalk.org/showthread.php?11...f-the-Delorean
In march I installed and did a dyno test of the Stage One exhaust which you can read about here:
http://dmctalk.org/showthread.php?11...Tested-Results!
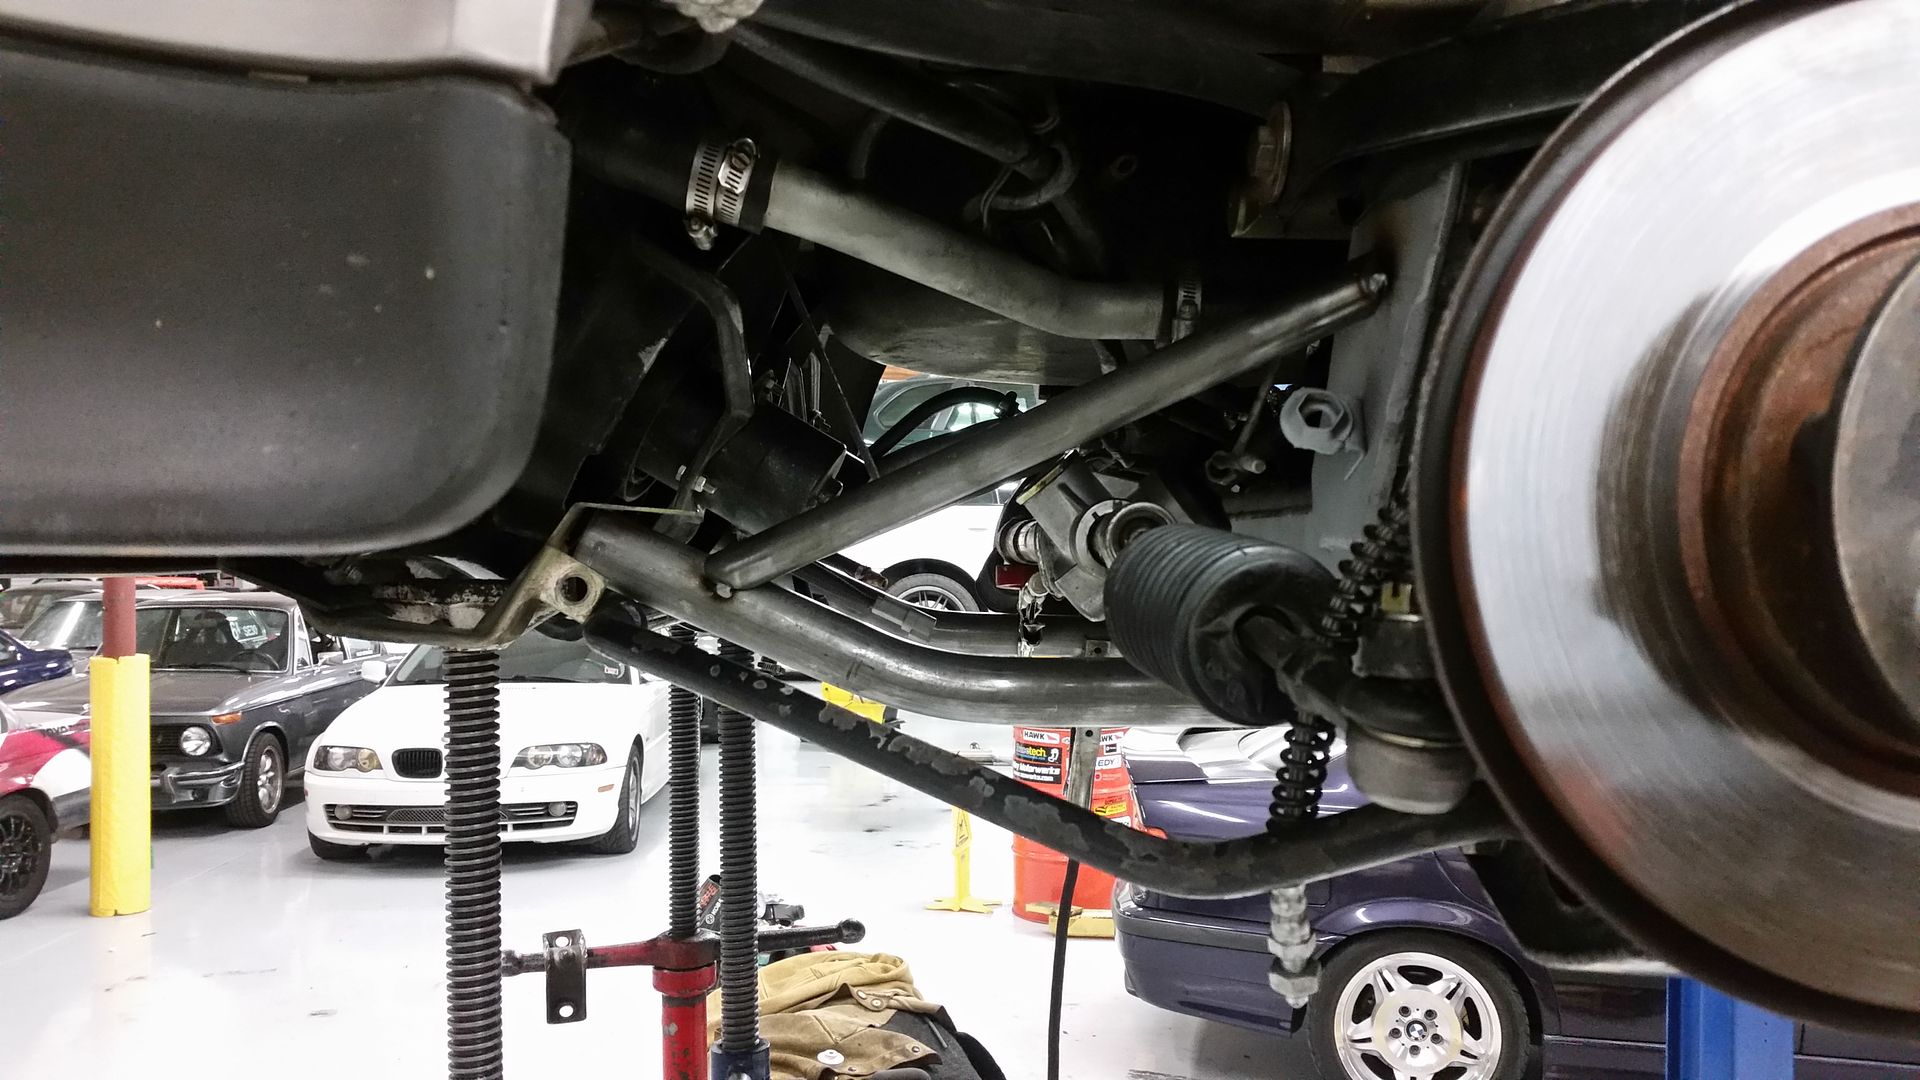
Now I did a rather interesting project back in August 2014 but I never posted about it as I wanted to keep it as a surprise for the local DMC club guys to see, then I forgot to post up about it here after that. So I will explain it now as it will help ( you can see in in these following pics), I was unhappy with the stock steering rack from day one and was always on the look for a better alternative. I drove a local car with a new rack but was still not happy with the feel and tightness. The Delorean needs a wide and thin rack with a small pinion area so it would fit in the frame of the front crush tubes, after years of familiarly with Mazda Mx5 race cars I grew to appreciate and respect the great quality of the steering rack in those cars made by Toyo Kogo. I opted to go with a non power rack from a base model 1991 Miata. I may upgrade to a Depowered hydraulic rack as they have a faster ratio.
I will post a new separate thread about the MX5 rack conversion when I get my pictures off my old PC. Things were going ok by April, that is except the head gasket was still getting worse, I had a combustion chamber to water jacket leak that would start over pressurizing the engine cooling when it got to temp and had more than a light load, So the car was still drivable but effectively only had a 30 mile range, Recently it has gotten much worse so that is my 2015 winter project. That is a story for the next installment...
But Then I Crashed....
Then on the morning of April 10th a momentary lapse in judgement allowed me to crash my car into a thick curb in a parking lot near my work. I didnt see it until it was too late, the impact was at about 10 mph and hit the passenger front frame area hard, nobody was hurt and luckily nobody saw me do it either. Thankfully I didnt get high centered on the cement and it wasnt quite tall enough to damage the Fascia but it did shear the right side sway bar mount off. I was able to limp the one block back to my shop to inspect what my stupidity did.
Radiator lower mount ripped too and caused a very minor weeping leak. I was planning to upgrade to the DMCEU aluminum anyway!
You can see how the sway bar mounting studs I installed years ago help up, the original welded nuts were stripped so I installed studs.
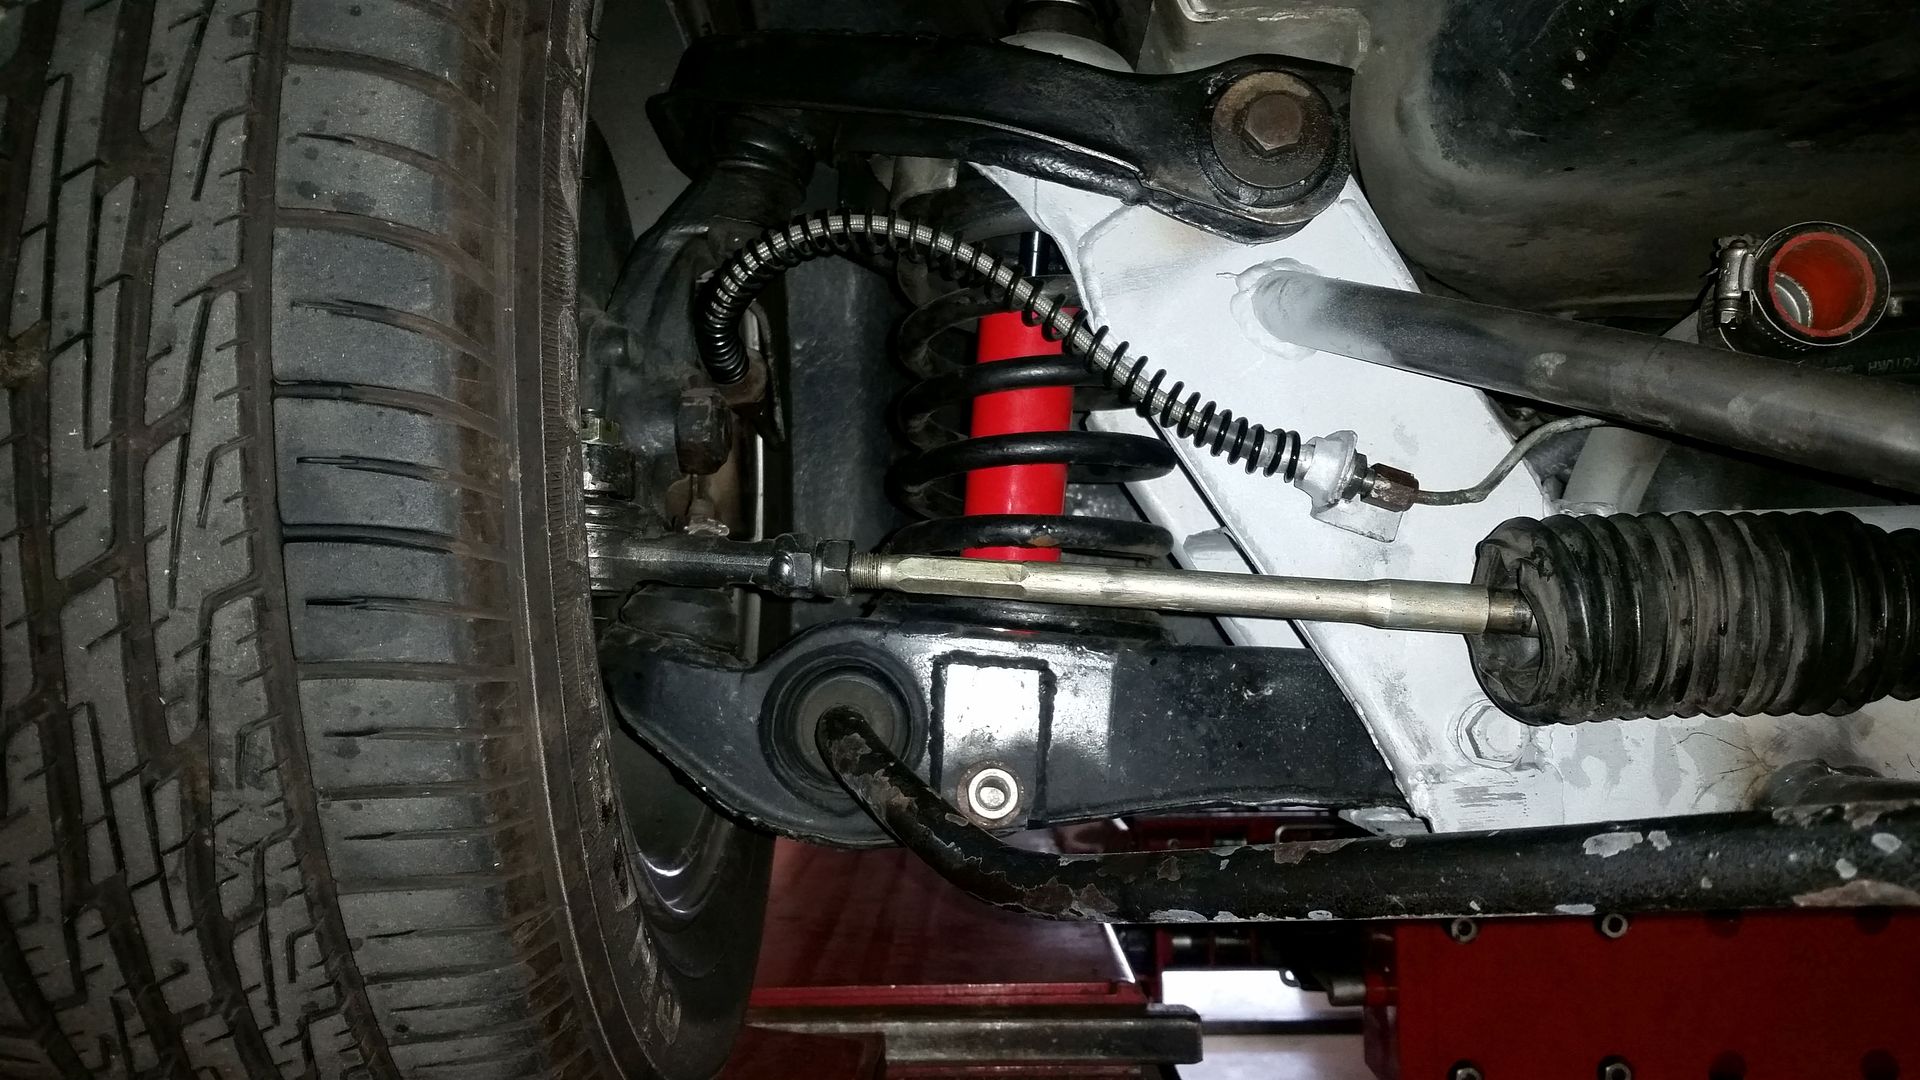
After the inspection I decided that trying to straighten the crumble tubes was not an option and I briefly considered looking into getting another frame as that was still my plan from all the rust damage and repairs this one had from years ago. Next I put the car on an alignment rack and found that suspension wise, the car wasnt actually bent, The caster was way off but that was from having no front sway bar attached. Camber was just fine and the toe is going to be sorted when the rack it reinstalled in the front end. I knew that replacement crumple tubes are availble for the rather steep price of $1200 and Im a fabricator that builds Race cars for a living so I wouldnt have to pay to have that installed by someone else either. But then I got to thinking overnight, Ive never liked the weak design for the factory front frame anyways. Why not design my own??? This would become the first step to totally redesigning the front suspension on my car.
So I just cut the whole thing off and started over:
New 1/8" steel on the front and bottom to create a strong foundation, No more worrying about denting the bottom of the frame with jack stands either. I spent alot of time with a wire wheel and sanding disc to finally rid the frame of rust and old epoxy, everything was sprayed with a good coat of weld through primer to keep the rust gone.
Then two pieces of 1.5x.120 DOM roll cage tubing bent in my tubing bender form the main two frame horns, with some 1 x.120 DOM braces. lots of measuring and trimming to get this square and level.
Now to mount the Miata steering rack, More tubing modified to make a clamp on system that will securely hold the rack and allow adjustments if I didnt get it quite centered.
Now the Sway bar:
Mounts were built but only tacked up, I would leave this weld for last. Using the Alignment rack I could get the Caster dead even left and right, better that before the crash. Also straighten the radiator and rebuilt its mounts too.
The steering rack also was installed slightly higher that it's original stock position, This would help remove bump steer on my lowered car.
Fully welded and stronger and straighter than ever, I could even jack the car up from the new cross tube which is much easier that reaching all the way to the front axle centerline on such a low car. I could now take her home after about 35 hrs of work and take it all apart again to spray on some fresh paint.


Location: France
Posts: 2,457
My VIN: 16951
Club(s): (DCO) (DOA) (DCUK)

Amazing job done on the front of the car


 Reply With Quote