FRAMING JOHN DELOREAN - ON VOD
www.framingjohndeloreanfilm.com
-
Senior Member

How To: Recovering Headliners 60+ photos
After nearly a year I have finally gotten around to completing my car's headliner replacement, Here is a How-to to give you some help, ideas and guidance so you can give your car a new headliner and save some money doing it. If your Headliner boards aren't in bad shape, and with the tools and supplies in hand this is a project that can be tackled in one weekend.
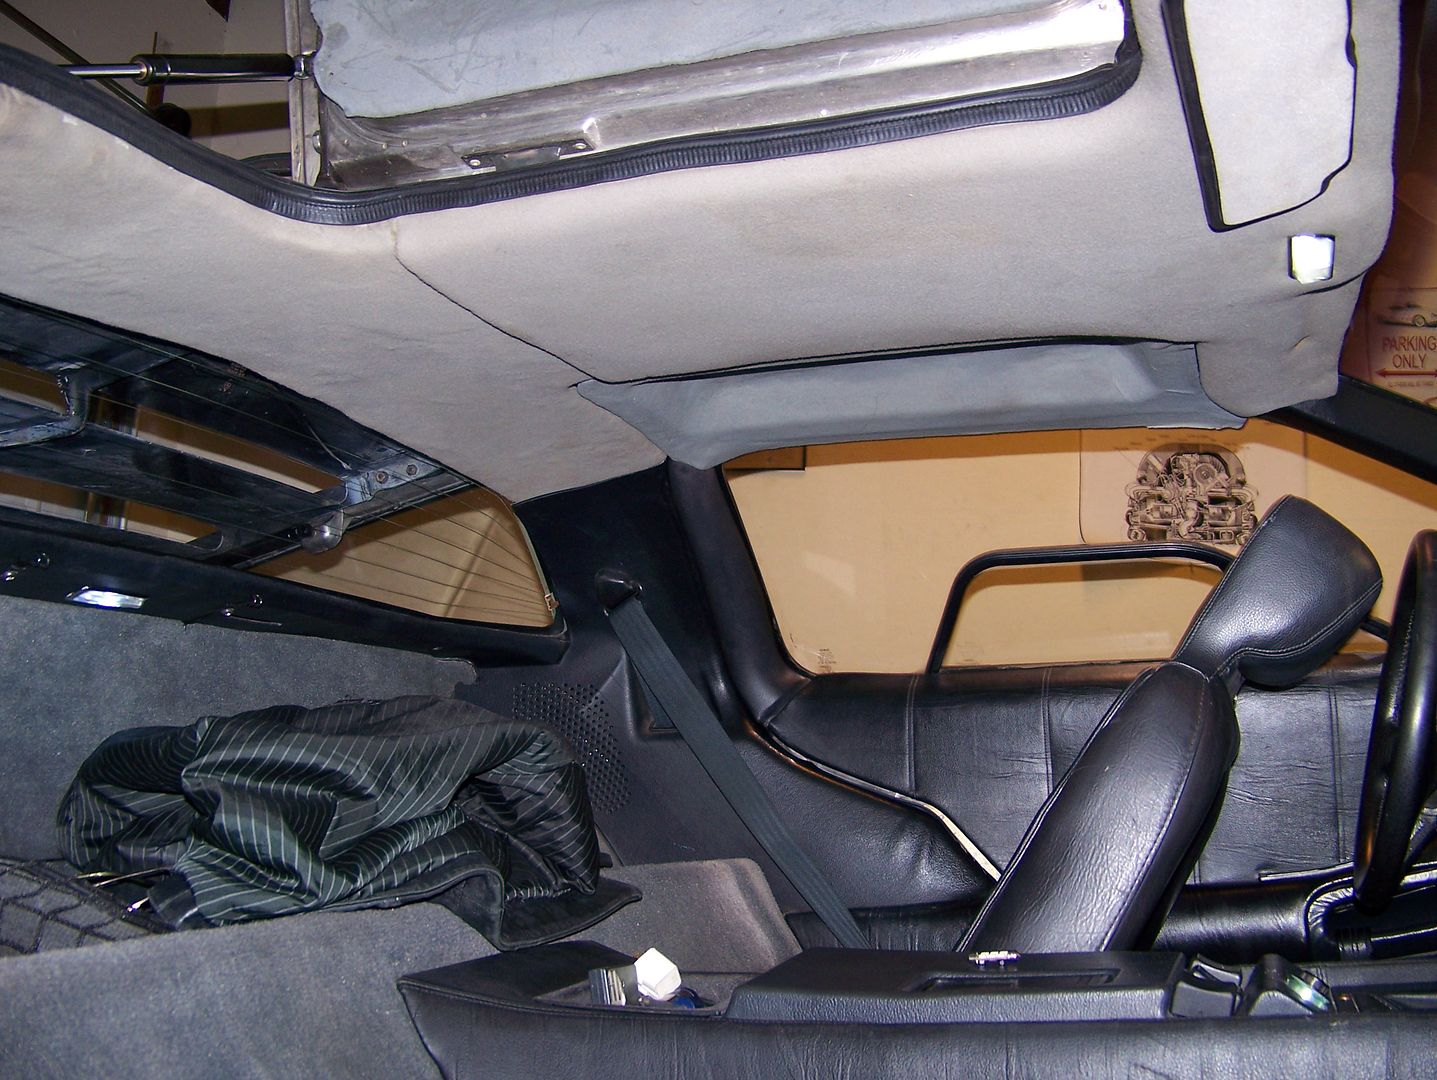
Like most of our cars 30 years on, the headliner material had begun to deteriorate and sag down, My center sections werent sagging too much but they were badly stained. Before we jump in, we need to know better how the liners are constructed. Unlike older cars that have a suspended liner with metal rods going across supporting the sewn material up, Our cars have a more modern and easier approach of having molded cardboard backing with the soft material simply glued on. The boards are attached to the roof with a metal loop riveted to the board and a hook for that loop to grab bolted to the roof, the perimeter around the door opening has excess material simply warping around the edges and pinched under the door seals. The front also is held up with the sunvisor bolts. The doors which have their own liners are attached with Fir tree plastic clips.
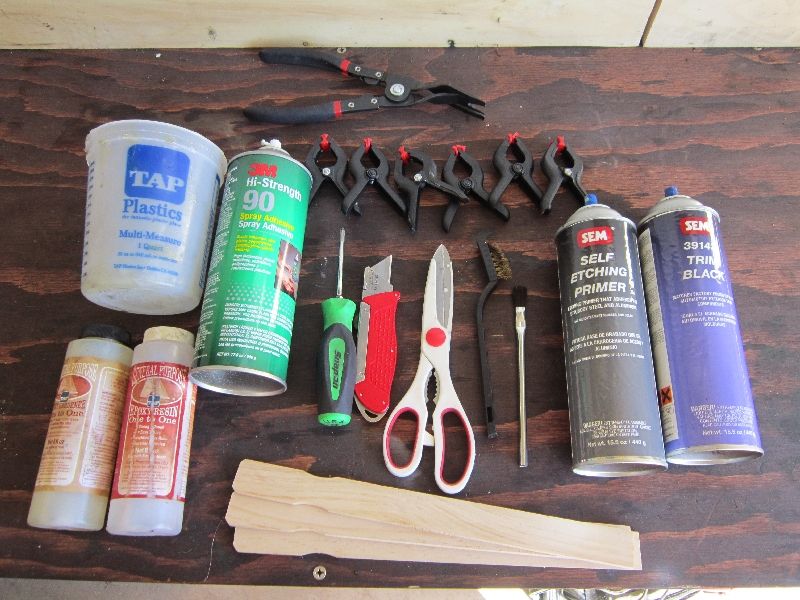
Tools and Supplies Needed
Scissors
Hi strength Contact Glue (do not get cheap stuff)
Razor blades
Sharpie
Dozen or more Clamps ( Clothes pins will work too)
Philips screwdriver
Metal wire brush
Fir-tree removal tool ( top of pic)
2.5 yds Headliner material
If your boards are damaged/creased you will need the following:
Epoxy Resin 6oz+ (polyester will do and is much cheaper/easier to mix correctly but smells much worse)
Mixing bucket
Acid brushes
Mixing sticks
More clamps
Heavy books
Wax paper
And if your sunvisor mounts are stripped/rusted like mine you will also need:
Drill
5/32 drill bit
5/32 x 1/4" Alum Rivets
Wire brush attachment for drill
Small vise
Primer and black paint
m5x0.8 Tap
New M5 bolts x4
Rivet gun
Dremel with cut off disc.
Step 1, Removal:
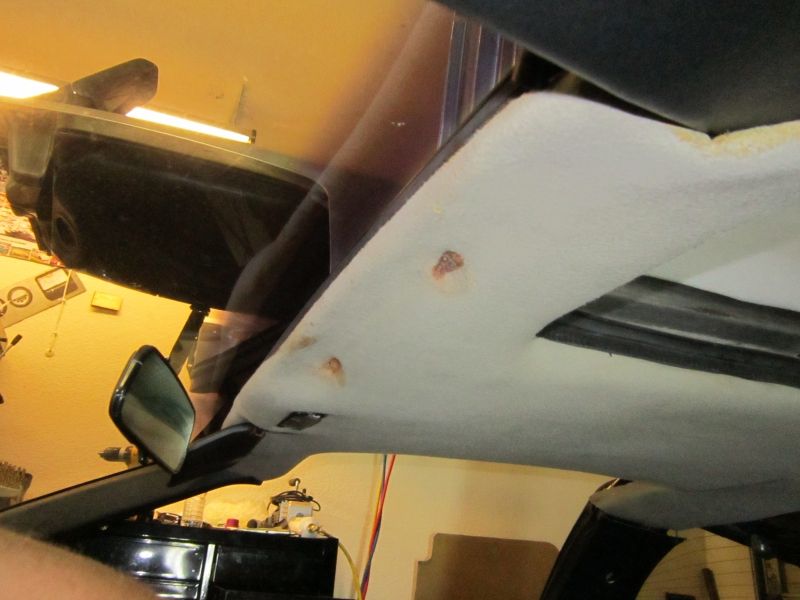
Remove Sunvisors, or in my case break them off
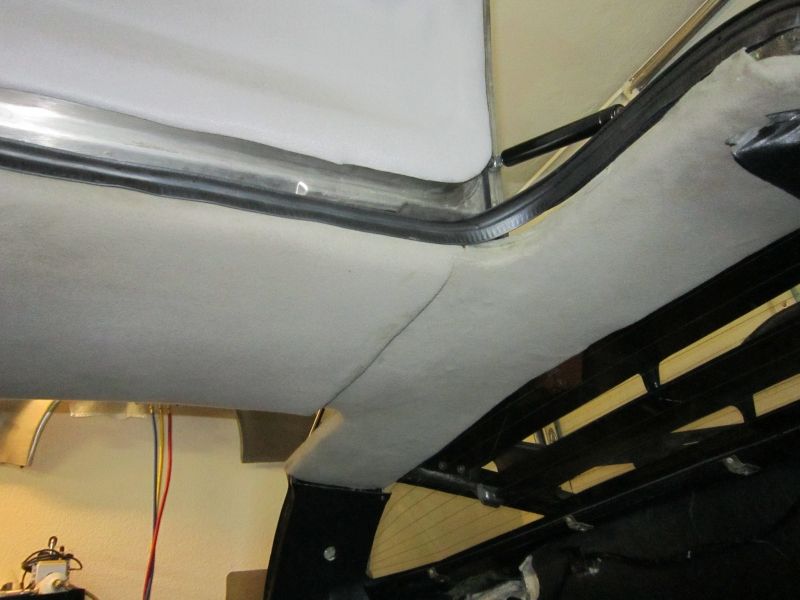
You dont have to be careful about damaging the material however you must be careful not to crease the cardboard backing as it will loose rigidity and the crease will be visible later. Pull off the inner door seals atleast around the top of the door, now start unfolding the material around the roof. The material is likely glued on so a sharp razor blade is necessary. Start with the front board as it overlaps the rear.

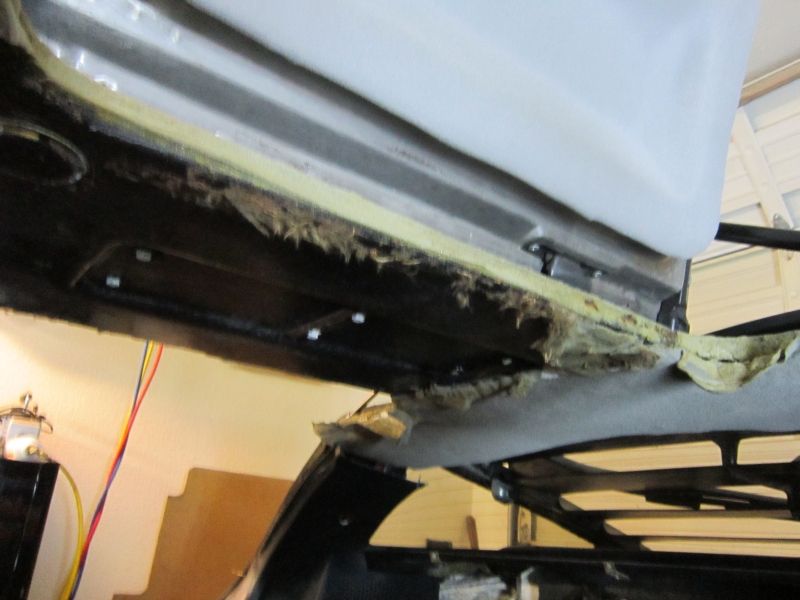
Now as you see there is alot of foam still stuck to the roof, This can removed with wire brushes. put down some plastic or blankets so the foam bits don't go everywhere. Try to get the fiberglass as clean as you can.
The door liners should pop off with the fir-tree tool or by hand if they are loose enough and you are gentle enough, remember not to bend the boards!
Step 2, Stripping the Boards and Prepping
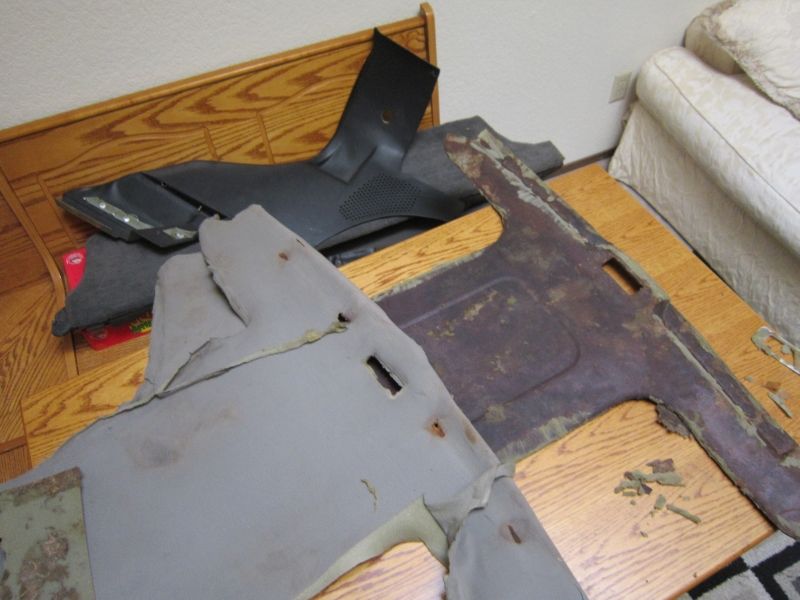
Take the board somewhere you can plenty of room like on a counter top or on the floor. Begin at one corner and pull the material off the board, dont worry if it rips or foam remains but bonus points are given if you get it all off in one piece. Just as the roof needed De-foaming the boards need to be bare, any little bump that remains on the board with be under the new material and will show. TAKE YOUR TIME AND BE SURE THE BOARDS ARE CLEAN AND SMOOTH. Use a manual wire brush with light pressure, just don't gouge the paper. Note the rear quarterpanel in this pic, You dont need to remove those panels to pull the rear headliner, although it would help.Not pictured but stripping the door liner boards was just the same. Now is the time to easily replace all the fir trees and repair and of the holes the screw into with epoxy.
Kinda looks like I skinned a depressed Sea ray huh?
 Posting Permissions
- You may not post new threads
- You may not post replies
- You may not post attachments
- You may not edit your posts
-
Forum Rules


 Reply With Quote